
Right now, you may be snuggled up under a blanket, the fireplace warming your toes. But me, I’m daydreaming about warming my toes in the sand on a sunny beach. I’m dreaming of Spring Break! It’s just a few weeks away for most of us. So it’s time to start planning that trip to the beach, or the mountains, or wherever life takes you.
My Spring Break packing list always starts with the perfect tote bag. I’ve had a fabric on my shop shelves that has been calling out “Take Me On Vacation”!! So today, I’m going to sew up a bright new bag that will be perfect for a vacation by the shore, or a stay-cation trip to the farmers market. This bag will take you from Spring to Summer and beyond……
This is a great beginner project if you are just diving into sewing, or a fun, instant gratification project for more advanced sewists. This bag is super versatile. You can make it with pockets or not. With a long shoulder strap or a short handle. You can choose any non-stretch fabric you like and customize it to match your bathing suit, your hiking boots, or your mood! You can piece it together from whatever you have stashed, or upcycle it from something you have laying around the house.
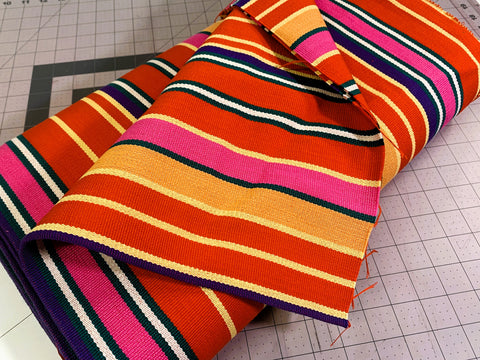
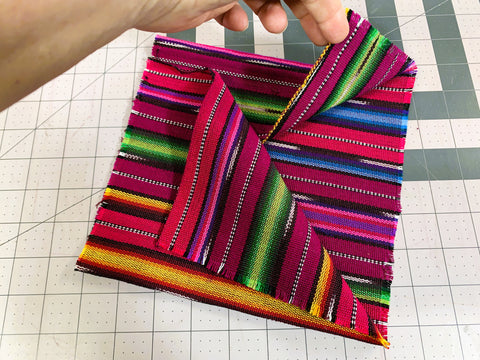
Today, I’m making my bag out of heavy weight, hand woven Guatemalan fabric. It is a nice tight weave (to keep the sand out) and has the most amazing bright stripes. It’s hard to choose just one fabric when you live in a fabric shop, but this one really shouts “VACATION” to me! Here is everything you’ll need for this bag project:
- ½ yard of outside bag fabric–preferably cotton or cotton blend in a medium to heavy weight, like a canvas, denim, or hand woven fabric
- ½ yard of liner fabric–also cotton, but can be lighter weight
- Remnant fabric pieces for pockets–any size for the pockets you prefer, or leave the pockets off, if you don’t want them.
- Material for bag handle–this can be made from a variety of materials some of the same fabric as the outside of the bag, webbing, heavy ribbon, Guatemalan belt fabric. It can be any length you prefer for your bag.
- Matching thread
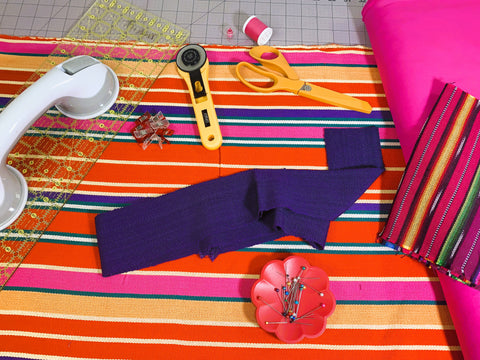
- Rotary cutter or scissors
- Self healing cutting board
- Straight Edge ruler
- Straight pins and sewing clips
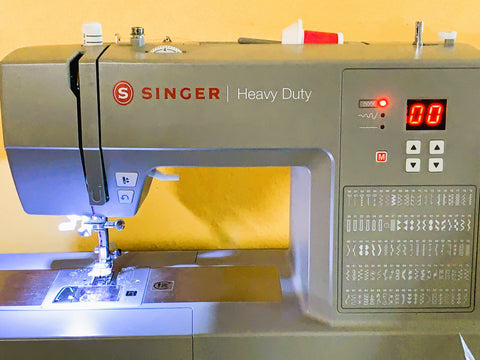
- Your favorite sewing machine–right now mine is the Singer Heavy Duty 6600C
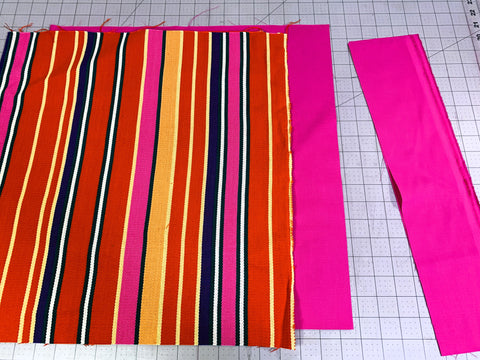
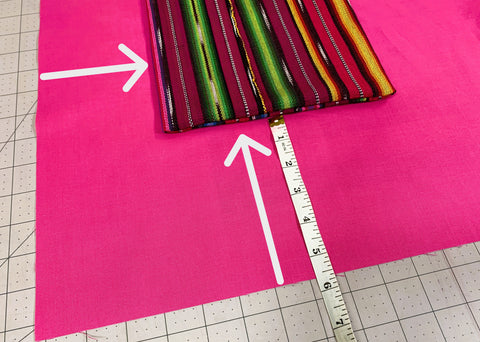
Start with your fabric. I am using a piece of hand woven Guatemalan fabric that is 18 inches by 36 inches. My liner fabric is hot pink cotton. It is a bit wider (it's a standard 44 inches when it comes off the bolt), so I cut it down to match the outside fabric. You can use any color or liner fabric you prefer. I like something that is a lighter color, so that I can see what is in my bag, but you might like a darker color to hide dirt.
My next step will be to make and attach my pockets. I’m going to make 2 different styles of pockets for this bag. You can make any kind of pocket you like, in any size to fit your needs, or you can leave them out altogether. I’m using a scrap of Guatemalan fabric that I thought was a nice pop of color for the inside of my bag. By making it a contrasting color to the liner fabric, it is easier to find when I am hunting around for my keys or sunglasses.
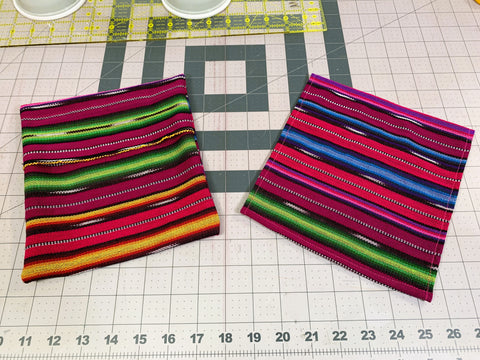
My first pocket will be an envelope style. It gives me a place in the bag where I can stash things and they won’t fall out, but it is easier to make than a pocket with a zipper. For this pocket my fabric is 8 inches by 7.5 inches. I will fold this up just like an envelope. Next I will sew closed the sides. Finally, turn it inside out and your pocket is ready to attach.

The second pocket will be a simple flat pocket. Turn in all 4 sides and sew around the edges. Now I can attach both pockets to the liner fabric. If I wanted to, I could attach them to the outside of the bag instead. Or I could put pockets on the inside and outside. Pockets galore!!!
I’m going to center my pockets on either side of the interior of my bag and position them about 4 inches from the top. But remember this is not rocket science, this is creative crafting. Your pockets can go wherever you like them best. I will pin them to the liner fabric with straight pins and then sew them on with a straight stitch on both sides and the bottom.

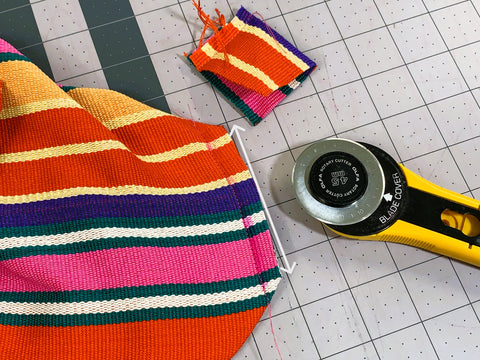
After the pockets are in place our next step is to place our handles on the bag. I had a Guatemalan sash that was a perfect match for the purple stripe in this fabric, so that’s what I’m using for the strap. This sash is 46 inches long and 4 inches wide. I cut it in half and trimmed off the fringy bits.
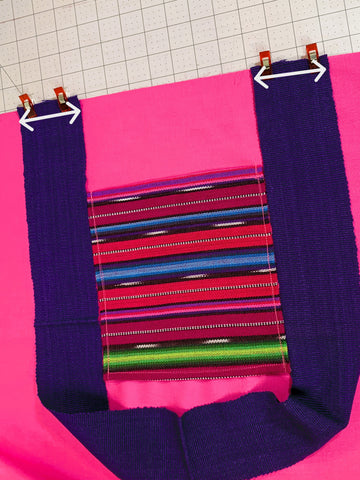
Next, I lay the straps down on the same side of the liner fabric as the pockets. Line up the edges of the strap with either end of the liner fabric. Make sure the straps are not twisted. Sew those into place.
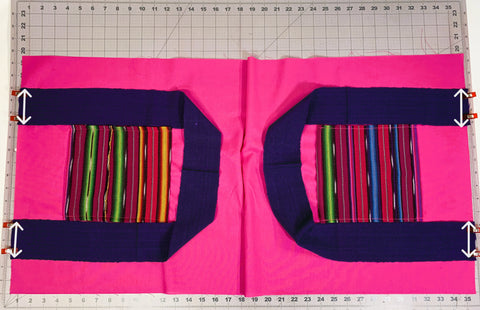
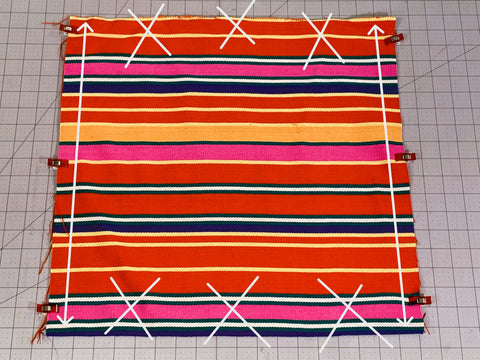
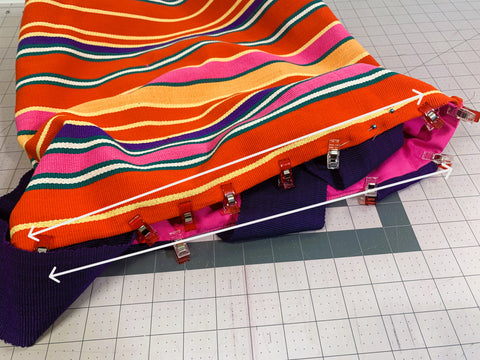
Next step is to fold our liner fabric in half with the pockets and straps on the inside. Stitch the two sides of the bag closed, but leave the top open.Where you see the white X’s on the photos DO NOT SEW. Do the same with the outside fabric. Be sure when you fold your outside fabric in half that you have put the two good sides together. The Guatemalan fabrics don’t have a good or bad side, so that doesn’t matter for this fabric, but for most prints you can easily tell the difference between the good and bad side of the fabric.

We are now going to square up the bottom of our tote bag. If I was making a book bag or computer bag, I might skip this step. But I want the bottom of my bag to be the perfect size for a rolled up beach towel, so squaring it up will make it wider on the bottom.
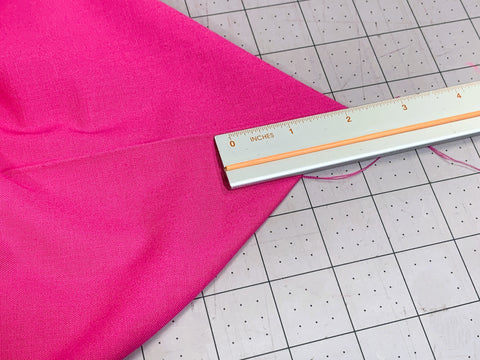
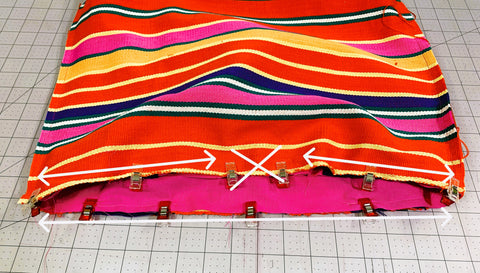
Start by pulling out the bottom corner of the inner fabric that you just sewed out and lay it flat, with the side seam in the center. Measure in 2 inches from the tip and make a mark.
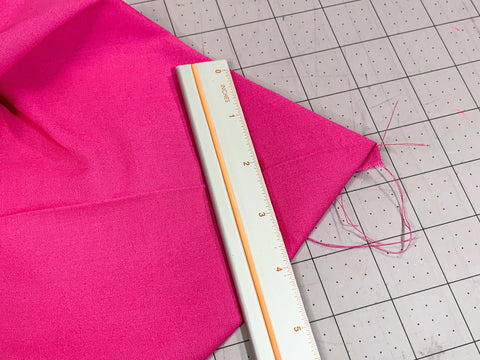
Now draw a line across that corner. It should be approximately 4 inches across. You can use a sewing pen or chalk.
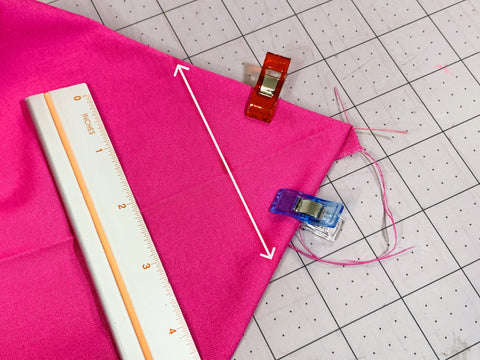
Pin it down and then sew along that line. Then cut off the corner. Do the same thing with the other corner and both corners of the outer fabric.

We are getting so close to finishing up your gorgeous Spring Break Tote Bag!!!
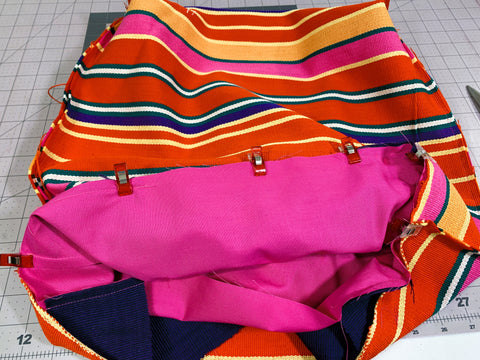
Now we are going to put our outside fabric and liner together. Turn your liner fabric right side out, so the pockets and straps are on the outside. Now stuff your liner into the outside fabric. The outside fabric should still be turned the wrong side out. Make sure your straps are tucked in and clip the top edge of both the inside and outside bag together.
Sew around the top, leaving about a 2 inch gap open. The white X shows where I did not sew and left a gap. This gap will be used to turn the whole project the right way around. Pull the whole bag through the small hole. It takes a bit of effort and you want to do it slowly so that you don’t tear any of your sewing.
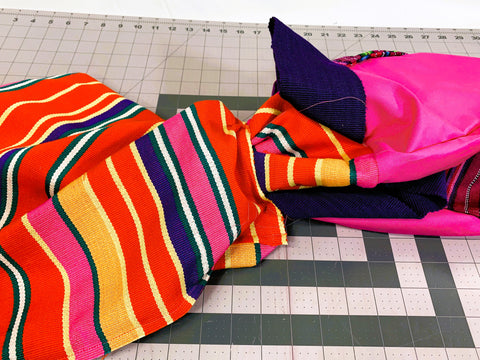
Then push the lining fabric back inside the finished bag. You should have 2 pockets on the inside and 2 straps sticking out the top.
Once you have it turned and stuffed and all straightened out and pretty, top stitch all the way around the top of the bag once, being sure to carefully close the opening left from turning the bag right side out. Then top stitch all the way around again for a good sturdy finish.
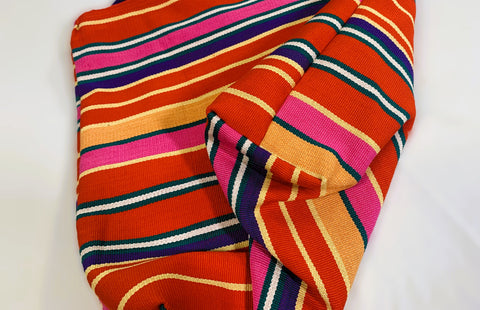
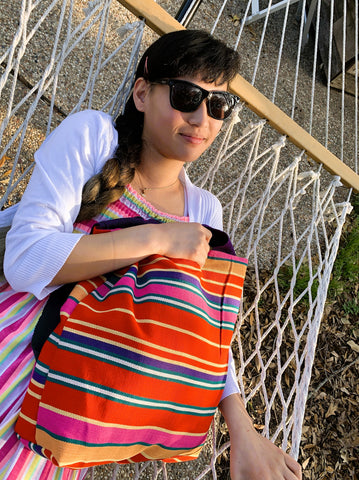
Push out your corners so that they are nice and squared up and voila!!! You are ready for your trip!
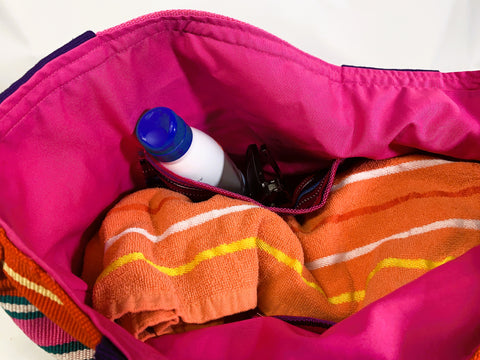
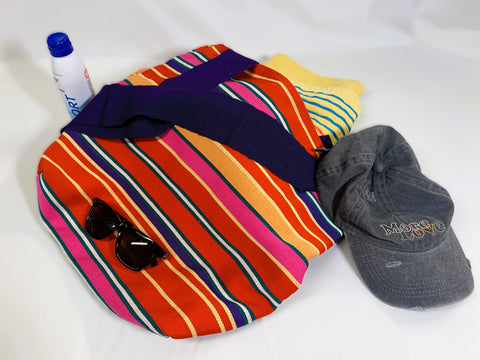
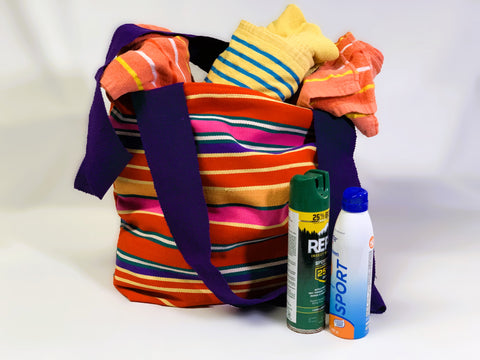
Add a few beach towels, your sunscreen and shades, and you are ready to hit the sand! Enjoy your Spring Break Tote Bag. And right after Spring Break, you can get started on your Summer Vacation Tote Bag!!!